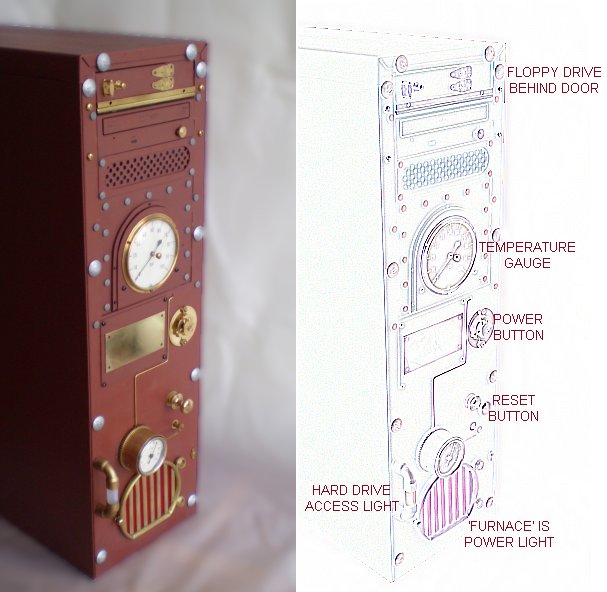
Inspired by the efforts of Jake with his Telecalculograph I decided that the new computer I was putting together was also to be in Steampunk style.
As of June 2007, its only 95% completed, but at the stage where you can see what the final outcome will be.
The starting point was a full tower case, but with the plastic front cover removed. Then everything painted with rust brown metal primer.
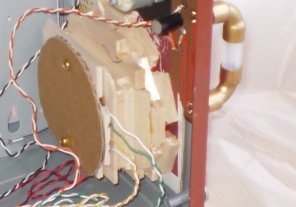 The 'Furnace' at the base is lit from behind by 6 10mm red LED's together with 6 flashing LED's, all in parallel.
The resulting effect, diffused behind two layers of red kite fabric, is a red glow that changes slightly in intensity.
The motherboard I have has outputs for a POWER LED and a MESSAGE LED, each of which are constantly on, so I've wired
them to each run 3 red LEDS and 3 flashing red LEDS. The circuit board that holds them is set back from the front
panel by a 'tube' of balsa scraps, to the let the kite fabric be more effective in diffusing the light, for a more
uniform appearance across the face of the furnace.
The 'Furnace' at the base is lit from behind by 6 10mm red LED's together with 6 flashing LED's, all in parallel.
The resulting effect, diffused behind two layers of red kite fabric, is a red glow that changes slightly in intensity.
The motherboard I have has outputs for a POWER LED and a MESSAGE LED, each of which are constantly on, so I've wired
them to each run 3 red LEDS and 3 flashing red LEDS. The circuit board that holds them is set back from the front
panel by a 'tube' of balsa scraps, to the let the kite fabric be more effective in diffusing the light, for a more
uniform appearance across the face of the furnace.
The front of the furnace is crafted out of brass tubing. Shaped, soldered and glued, 10 pieces in all, plus bolts.
The hard drive activity led is comprised of a small piece of silastic tubing (about an inch long) between 2 corner pieces (copper, painted gold/brass) from the plumbing section of the local hardware store. At top and bottom of this arrangement is two 'sunset red' LEDS whose light reflects around the corner of the copper tubing and diffuses through the silastic tubing. A small resistor/capacitor circuit creates a low pass filter to slow down the rate at which it can flicker. A somewhat less digital effect.
The small gauge above the furnace does nothing as yet. Maybe I will wire it up to reflect the amount of internet traffic.
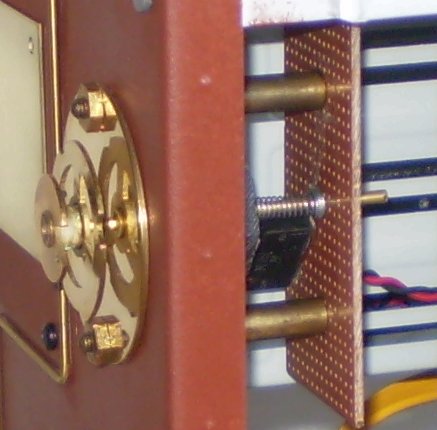
 The power switch is comprised mainly of parts from a non-functioning (clockwork) mantle clock, set to trip a
microswitch when pushed.
The power switch is comprised mainly of parts from a non-functioning (clockwork) mantle clock, set to trip a
microswitch when pushed.
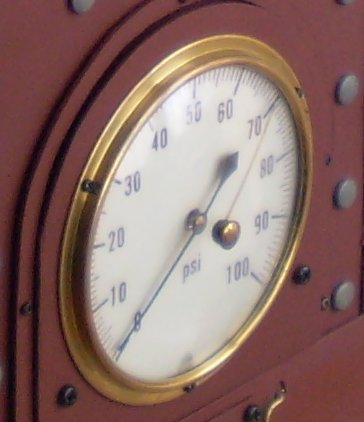
The main gauge (parts from an old barometer) acts as an analog thermometer, being run by a small electric motor held back by a weak spring. The voltage to it is set by a small fan controller circuit similiar to the one described HERE.
The thermistor for the circuit is just sitting inside the case, and when powered on the gauge reads just over 20 'psi'. Once I sit the thermistor closer to the E6600 CPU and start overclocking it, then it'll probably start reading a bit higher. The background to both gauges are simply pictures printed out on my inkjet.
- In the near future I will etch out the brass plate to the left of the power button. This will be the 'name plate' of the machine. Etching will be performed with the laser print iron-on transfer to brass method described HERE.
- As you can see there are a number of black phillips head screws. These will be replaced as brass screws come into my possession.
- I'd like to cover/hide/disguise the DVD drive, but am still to finalise on the idea.
- A function for the small gauge.
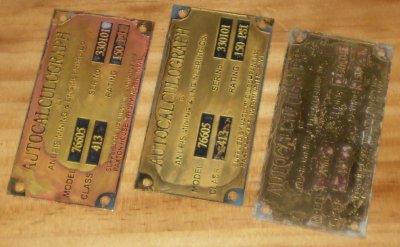 Update on the brass name plate - I've tried etching three times now and results are a bit average. I also think that perhaps the 'brass' plates I'm using arent uniformly brass all the way through, seeing as how I've just discovered sanding them down produces a wierd layered effect. They're actually PLEASE CLOSE THE GATE plates that I'm etching the rear of. Time to get some different brass, or clean them up a bit and go for an 'aged' look. Incidentally, the one on the right looks better in real life, the flash washes out a lot of the depth effect.